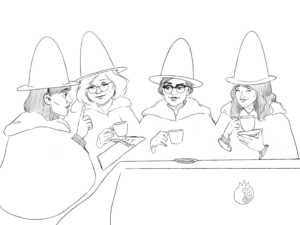
Over my decade-long cosplay career, I’ve made around 20 cosplays that I’ve worn to various events (conventions, book and movie releases, Halloween parties, etc). I by no means consider myself an expert, but occasionally, friends ask me how to get into cosplaying. I think that they – along with many others out there – see the amazing costumes and props that make it to the frontpage of Reddit or Buzzfeed and become simultaneously inspired and intimidated. They want to try out the hobby but may not feel confident in their costume making skills.
Sucking at something is the first step to being sorta good at something.
– Jake the dog, Adventure Time
This is some very wise advice from a cartoon (who I’ve cosplayed a few times!) that can apply to just about any hobby. Everybody has to start somewhere. Here’s a guide on how I create a cosplay. And strap in: it’s a long one.
Do your research.
Start by gathering as many reference pictures as possible of the character you want to emulate. Get screenshots from as many different angles as the internet will allow so you can get a complete idea of what you will need for the costume. What’s it look like from the front? The back? Are there any props or weapons that go with the costume? What do those look like from the front and back?
Make a list and check it constantly.
Write down every single little thing you’ll need for your costume. Be as detailed as possible.
- Start from your head all the way down to your toes, listing every article of clothing or prop that your character wears.
- Divide up your items by these categories: Already-haves, Need-to-buys, and Need-to-makes. Categorizing in this way gives you a clear idea of the next steps you’ll need to take.
- Decide what method or methods you will use to make everything. Usually, my cosplays tend to be a mixture of modifying existing clothing and making things from scratch.
Use what you’ve got!
Maybe you’re just not comfortable enough yet to make something from scratch, so you want to buy a base that you could modify. This involves finding an article of clothing that’s as close to your costume as possible, then adding little details so that it matches.
Here’s an example of me modifying some clothes I already had to suit my needs.

It may not look it, but the only article of clothing I made from scratch here was the cape. I already owned the black jacket — I just added the (decorative but non-functional) gold buttons and the red patches. I made the cane by painting a bottle yellow and hot-glueing it to a Swiffer mop handle I had painted black. The pickelhaube (helmet) was a London police hat I bought from Party City that I modified to match. Even the belt was something I modified (I took a brown belt and painted it black).
Be thrifty and frugal!
Shopping for materials and fabric for costumes can get expensive. Be sure to take advantage of any deals or coupons you can. Jo-Ann’s has a mobile app with handy coupons as well as a service you can sign up for that will mail you deals. Thrift stores can be helpful for finding a good base for a costume. For instance, my Pikachu cosplay consisted of a yellow shirt and pair of yellow shorts that I found at a thrift store. My ears were made from cardboard, yellow fabric, black fabric, and a headband. My tail was made from a hanger and some yellow and brown fabric. Both the tail and ears were constructed using tons of hot glue. The entire thing cost me about $8.

Despite the trolls, the internet is your friend.
One of my first steps when working on a costume is checking to see if anyone else has done it. Sometimes, I’ll be lucky and find a tutorial or even a pattern for part of the costume. My favorite example of this is the prop weapon I made for my Blake Belladonna cosplay. This saint by the name of Tetsuro already made a ready-to-print pattern of the weapon along with instructions. He also had a blog post explaining his process. I didn’t follow it exactly, but having the pattern helped immensely in cutting down planning and construction time.

Can’t find one? Make one!
There will be times that you just won’t be able to find something close enough to your costume to modify on the internet or in a thrift store. In these cases, you’ll either need to make your costume from scratch or buy it online from a cosplay store or from cosplayers who do commissions.
The process of making a garment from scratch is long and varies from costume to costume. Here are a few general steps you should take when creating something new.
- Do your research. Get to know the costume so well that you could describe it without looking at a picture.
- Sketch out the costume from different angles to get an idea of which pieces you will need.
- Get your measurements and check them thoroughly. Have a friend measure you to make sure everything’s accurate. It also helps to wear whatever clothes you know you’ll be wearing underneath your new piece.
- Find a pattern to modify. Look for a pattern by searching online for a printable one or by purchasing one from a craft store. Sometimes you can’t find an article of clothing already made, but you can find a very similar pattern for what you need. If you can’t…
- Draw out a pattern on some paper, being mindful of your measurements and all the sketches you made earlier. Be sure to mark which piece is which and note how many of each piece you’ll need.
- Make a prototype using some scrap fabric. This part of the process requires some sewing, either by hand or with a sewing machine. Make sure to follow all instructions and safety information that comes with any tools you may be using. If you need help with sewing, check online for helpful tutorials.
- Improve upon the prototype. Note if there are any adjustments that need to be made in length or size. Then redraw a new pattern with this information in mind.
- Make the real deal! If you’re feeling confident in your new pattern, you can go ahead and use the final fabric that you bought. If you want to be doubly sure, you can make a second prototype. I tend to err on the side of caution, so I like making a prototype 2.0 if I have enough scrap fabric.
- Bask in its glory. Hopefully at this stage, you won’t need to make any more adjustments. But if you do, don’t fret. It’s all a learning experience that you can apply to your next costume.
Props & Accessories
The process above can, for the most part, be applied to making props (but with construction in place of sewing). I tend to skip the prototyping phase for props, mostly because I don’t have enough scrap material to make a prototype first. This is why the planning and pattern stage are very important if you’re not going to build a practice prop initially.
There are quite a few different materials you can use including but not limited to: craft foam, foam board, insulation foam, worbla, papier-mâché and wood. Constructing props and weapons can be very dangerous depending on what methods you’re using, so be careful! Also, make sure to paint your props in a well-ventilated area!
Some prop resources
Don’t want to dye your hair that crazy color? Wigs it is!
You may notice when looking through my cosplays that I rarely use wigs. I have used wigs before, but they were for the most part straight and didn’t need any styling. It’s something I’ve been wanting to learn and get better at, so I’ve been scouring the internet for great tutorials. Here are a few that I think can help beginners like myself! We can learn together!
Online wig stores
Tutorials
- Removing Shine/Detangling Wigs
- Helpful Tips for 1st Time Wig Wearers
- Malinda-chan‘s gallery of wig tutorials
- Arda Wig‘s super awesome list of wig tutorials (they also recently announced that they’re selling cosplay makeup!)
Say you tried everything I’ve listed above and you just can’t get what you want in time. Or perhaps you just read all of that and thought “no thanks.” There’s always one last option.
Don’t be ashamed of buying a readymade costume.
There are services and cosplayers online who sell cosplay commissions. These can range widely in price, quality, and timeliness, but if you’re not feeling confident (or just don’t want to make one) this is a perfectly valid option. I’m all for supporting cosplayers by paying them to make these commissions; the money they receive usually tends to go towards making their own costumes, which can continue the cycle of inspiring other people to try cosplay. Or it can pay for their rent and food, which is also good.
You’ve got a cosplay! Now what?
Now it’s time for the con/book release/party. You’ll be revealing your newly-made costume to the world. Here are a few short tips on getting the best out of your cosplay experience.
- If you have a costume that takes up a lot of space (giant wings, a huge scythe, etc.), be mindful of the people around you.
- Don’t be afraid to take pictures of other people’s cosplays and always say “thank you” if someone asks for yours.
- If you see a costume you like and are curious about it, go ask the cosplayer about it! If they made it, chances are they would be happy to talk about their process or what materials they used.
- At some cons I’ve attended, there’s been a cosplay first aid booth with sewing kits, hot glue and the like to repair costumes that may have come undone during the con. Not all cons have this, however, so I suggest bringing a little something with you if you think your costume may need a patch-up at any time.
There’s your intro to the cosplay world! I’ve been your host, Ash. You can find my cosplays on ashweez.deviantart.com or you can check out my blog post detailing the process of making my Blake Belladonna cosplay from RWBY! Check out the links below for other cosplay tutorials and resources! Feel free to leave a comment too if you have any questions.
- KamuiCosplay‘s Tutorial Books (at the bottom are even more Cosplay books!)
- Sewing Basics: 12 Things You Need to Get Started
- CosplayTutorial.com
- Commander Holly‘s “How To: Mascot Costume – Cosplay Class” (I really want to try this one out eventually)
- Budget Cosplay 101
- A huge list of free patterns and tutorials on cosplay.com
Featured Pokemon photo credit to TC Schiller.


